Inside ToteSavvy

What's In Baby's Carry-On by Hillary Folkvord

Inside ToteSavvy

What's In Baby's Carry-On by Hillary Folkvord

by Life in Play Team on Jun 03, 2018
As you know when traveling with a baby, you must be ready for anything: blowouts, delayed flights, sickness, etc. Before I give you my lengthy list of items, my number 1 item to start with is the TOTESAVVY insert.
Packing ToteSavvy for a Newborn

Inside ToteSavvy

Packing ToteSavvy for a Newborn

by Hilary Gebhart on May 27, 2018
  Packing your purse or diaper bag can be so overwhelming! You want to carry enough so that you have everything you need, however you don’t want to be lugging around a suitcase full of things for your baby. Here at ToteSavvy, we’ve had many years of mothering (and a combined 4 newborns) so we have a tailored down list for you! Here are the basic things you’ll need in your ToteSavvy when you’re out and about. We know newborns are needy (because they have to be!) but let’s talk about your stuff first. Remember to take your wallet, keys, and phone. It might seem obvious, but I’ve forgotten at least one of these things before! Bring a snack for yourself, as well as a water bottle. You can be a better mom if you’re fed and hydrated. I even keep snacks for myself in my car so I'm never going without. I love my mini pochette. Inside, I keep mascara, lip gloss, a brow pencil, band-aids, a pen, and some hair ties. I never go anywhere without it! Now, for the baby! You may have extra things you want to take, but here’s a fairly comprehensive list! Diapers and wipes: You’ll need to take several diapers and lots of wipes. There are so many blowouts when they’re brand new. An extra outfit (see: blowouts, above) Milk: Pack either formula or breast milk, and keep it in our insulated pocket for temperature regulation. Newborns use tiny bottles, so you can stack two in there! If you're nursing and not using a bottle be sure to pack any essentials that make nursing easier for you. A carrier- Sometimes a stroller or car seat just isn't going to cut it. Your baby just wants you!  Babywearing is wonderful for many reasons, one of which is that it enables you to still have your hands free while giving your baby the closeness he or she desires. I adored my ring sling! One of the many benefits of a ring sling is that it can tightly roll up and be slipped into a pocket in your ToteSavvy. I was too intimidated to use a ring sling for the longest time, but I wish I had used them from the get-go! (Note: I highly recommend finding your local Babywearing International chapter, they can help you with, and even loan you, a ring sling. I bought a very reasonably priced one from Sleeping Baby Productions. There’s also a few B/S/T groups on Facebook!) A blanket: Copper Pearl makes the softest blankets! A blanket could be used for nursing, a car seat cover, or for warmth. Plus, their prints are adorable! The tiny pockets in the ToteSavvy are perfect for nipple cream or diaper cream. My daughter gets a diaper rash easily, so we always kept some cream on hand. Don’t forget your hand sanitizer! I loop mine around a ToteSavvy handle so that I have easy access. My daughter was a major paci lover, so a pacifier and clip went everywhere with us for the first year of her life. A paci really comes in handy during car rides when you’re unable to help soothe your baby!  When I was a new mom, I even went so far as to make a little checklist so I knew I'd have the necessities. It's so easy to forget something when you are exhausted and sleep deprived. We hope this list helps packing your bag just that much easier. You got this, mama!    
ToteSavvy Mini Ready-to-Go

Inside ToteSavvy

ToteSavvy Mini Ready-to-Go

by Hilary Gebhart on May 20, 2018
  As my daughter has gotten older, my handbag needs have changed. A.J. goes to daycare a couple times a week and in the fall she will start preschool. When I’m not with her, sometimes it’s nice to really pare down what’s in my bag, and leave my toddler necessities at home. The ToteSavvy Mini is perfect for this purpose. That way I can just keep it by the door, dropping it in my purse on the way out. Here are some things I pack in my Mini so it's always ready when I need it: One pull-up, and a small pack of wipes: We rarely need to do a diaper change while we’re doing errands. If I’m to be totally honest, sometimes I may not even have a pull-up with me because I keep a deluxe changing kit in my trunk with several of them. A variety of snacks: My toddler’s preferences change more often than the wind (I know you can relate)! I keep a few bars, a fruit pouch or two, or some crackers. A sippy cup: I only pack water in my Mini so that if I forget about a sippy cup, it’s not the end of the world. I recently found what must have been weeks old sippy cups in my car and was so thankful that they weren't full of milk! Entertainment: I will pack a book, some stickers, and maybe some blank paper she can color on. The middle compartment is perfect for this. We shared our top picks in this post. Odds and ends: The small pockets are perfect for things like hair ties, bows, and band-aids. Now that it’s summer, I will pack a small bottle of sunscreen. If you can’t find a small bottle of your preferred sunscreen, buy a tiny squeeze bottle and pour the contents in there. There’s no reason to carry around more weight than you have to! Hand sanitizer: I will forever have my hand sanitizer looped on to the handle so that I can access it easily. Plus, it frees up a pocket for something else!   The ToteSavvy Mini is much more compact than the original size, however you may be surprised how much can fit inside! It’s so nice to have my Mini by the door so that as I’m heading out with my daughter I can just throw it in my bag on the way out!        
Neely & Chloe's 365 Market Tote

Inside ToteSavvy

Neely & Chloe's 365 Market Tote

by Hilary Gebhart on Apr 25, 2018
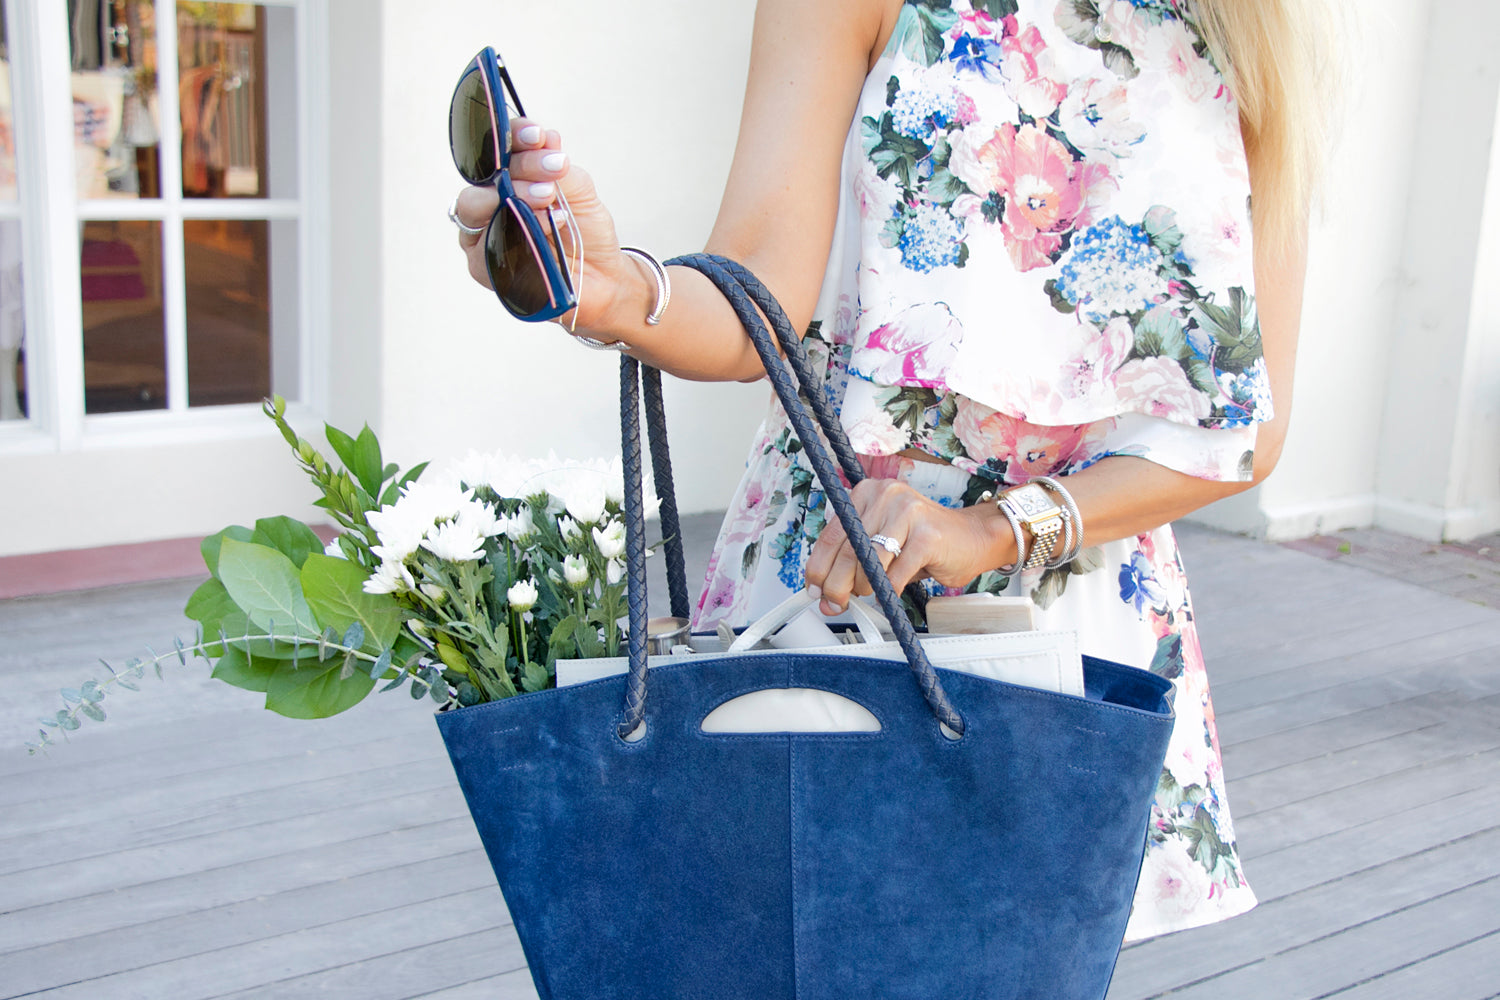
Neely and Chloe are sisters who started a line of luxury handbags and small leather goods. They believe in quality materials and classic lines and want their products to last for years and years. Their beautiful workshop in New York is where their products are developed. They're also able to embroider or emboss their goods, giving a subtle, classy personalization to your purchase. Tassels and ornaments are also available, to even further elevate your handbag. I’m not usually one for bag accessories, however, I love theirs. Their choices are so classy, I can’t help but be enamored. Recently, I used their 365 Market Tote as my primary handbag. Did you know that this bag was one of Oprah’s Favorite Things for 2017? That’s how you know it’s good. I have to be honest, I was a little worried about using a suede handbag considering I have a toddler, a dog, and a cat. We’ve also been having some rain, too, so I was pretty paranoid about using it! I’m happy to report that the bag is still in perfect condition, despite my messy and chaotic life. I adore the braided handles on this bag! What’s even better is that it’s one continuous loop, threaded throughout the perimeter of the bag. When you’re wearing it, the top cinches closed just enough to make it feel secure and private, while still letting you access your belongings at any moment. I really love its top handle, too. It makes it so easy to quickly grab it without fumbling around for the shoulder straps.     This bag brings sophistication to any outfit. It goes well with jeans and a casual top on a lunch date, and it looks equally stylish when you’re off doing errands with kids in tow! It’s really a jack-of-all-trades bag, which makes it so great.  It’s very roomy without feeling like I’m carrying around a suitcase (so important!). If you haven't checked out Neely and Chloe yet, you need to stat!  Below are a few of our favorite Neely and Chloe totes (including the Market tote of course!), all perfectly sized for ToteSavvy original.    shop this tote   shop this tote   shop this tote      
Potty Training: You've got this!

Inside ToteSavvy

Potty Training: You've got this!

by Hilary Gebhart on Mar 22, 2018
I have so many mixed feelings about potty training. I’m excited to no longer deal with diapers, but potty training itself just seems so intimidating. While potty training is a very individual process (what works for one kid may not for another), we can help you arm your ToteSavvy with everything you’ll need to get through this challenging time. A change of clothes: I have not carried a change of clothes with my since my daughter was an infant. However, during the potty training process, you’ll want an extra outfit on you at all times. You may even need to pack extra socks or shoes, depending on the severity of the “situation.” Don’t forget extra pull-ups or underwear! A wet bag: You don’t want to be stuck without something to contain soiled clothing! A seat reducer: We have this one. There are so many out there, but I liked how this one folded up and included a storage bag to keep the gross factor down. I know my daughter will feel more relaxed knowing that she’s sitting on something made for her tiny tush. Wipes: You never want to be caught without them, especially in poo-mergency. Oh, the horror! Reward: While not everyone agrees with using a reward, some kids do need extra encouragement, especially in a public restroom. Those automatic flushing toilets can be scary! A little tube of mini M&Ms is small but will last you a long time. Plus, it already comes in a perfect container! Hand sanitizer: The other day I was in a restaurant bathroom and I could hear a mom telling her child, “Stand still! Don’t touch anything!” I had to stifle my laughter because it’s so true! Your little one is so curious and wants to explore everything. Yuck! Sticky notes: We know it takes some time to get your kiddo situated on a public toilet. And that doesn’t even account for them even using it! It’s scary when the toilet auto-flushes while they’re still actually on the toilet. Buy some small sticky notes to put over the sensor to help prevent this from happening. What are your potty training must haves (other than a glass of wine at the end of the day)? You got this, mamas! We can do it!
Carry Your LV Neverfull MM or GM as a Diaper Bag

Inside ToteSavvy

Carry Your LV Neverfull MM or GM as a Diaper Bag

by Lauren Kutting on Jan 22, 2018
If you're in the market to turn your Neverfull into a diaper bag, this post is where you need to be. Below I'll show you the difference in sizes (MM vs. GM) and how the two ToteSavvy sizes (original and mini) fit inside. 
6 Health and Fitness Tips for Your Best You

Inside ToteSavvy

6 Health and Fitness Tips for Your Best You

by Rebecca Cafiero on Jan 07, 2018
This guest post is written by Rebecca Cafiero––Healthy Lifestyle Expert, TEDx Speaker, and Certified Holistic Nutritionist. Learn more about Rebecca and her lifestyle tips at www.rebeccacafiero.com.   Are you tired of the New Year, New You theme that seems to pop up every January 1st? Or even more wary of rinse and repeat resolutions that never seem to gain traction? Or perhaps you’re rebelling against missed expectations by NOT setting goals this year. A while back, I found an old journal with my New Year’s resolutions from when I was 22 . . . More than a decade ago! And scarily, my resolutions haven’t changed much over time. Lose 10 lbs. Work out more. Eat healthier. Do a cleanse. Drop a jean size. Despite my best intentions and efforts over the years, and regardless of the small fortune spent on too-small workout clothes bought to reward dropping a size or trainers meant to motivate me, I found myself continually failing to create sustainable habits. So the cycle of restarting my goals at the beginning of the year, or month, or next Monday, became endless . . . Until I made a few tweaks that have completely changed how I approach goals AND have helped me begin achieving them. I like to think of New Year’s goals as just minor recalibrations. First, I take time to review my progress over the past year, and then I decide the areas I’d like to improve in, or where I want to shift focus or energy to. Challenge yourself to do away with the idea that you need to recreate yourself in the new year. Leave thoughts like it behind in 2017! You are already great, and are just ready for a new year optimization!   Be A Goal Digger Create simply written and clearly defined goals. Be sure they are measurable, but not so specific that you’re setting yourself up to fail by mid-January! Life happens! Also, beware of making TOO many goals! You don’t need a whole list. Just a few goals with actionable steps. AVOID goals like: Work out more (too vague) Hit the gym 5x per week (not realistic) DO make goals like: -Move my body for 30 minutes at least 3x per week. This could be a long walk or hike, hitting the gym or yoga studio, or doing an at-home workout. -Sweat daily Little actions like taking the stairs at work or parking at the far corner of the parking lot add up over time!   Get Accountability Studies show that having an accountability partner can increase your chances of completing your goals by 65%. And while one buddy is better than none, if that person loses steam or focus, you’re left tackling your goals solo. Instead, find 3 to 4  friends and start a group text. Cheer each other on when you hit the gym, share photos of your healthy and delicious food finds, and encourage each other to push through when life happens. Not only will the daily check-ins from others keep you motivated, but constant contact with a group of positive, action-oriented friends with similar goals is an added bonus! Develop a mindfulness practice Start your day off right by dedicating 5-15 minutes of time to self-care. In just 10 minutes each morning, you can give yourself a solid foundation mentally, physically, and emotionally for the rest of the day! 1 Min Exercise: 60-second plank hold to activate the body and get the blood flowing! 3 Min Meditation: Use the SOS feature on the Headspace app! 1 Min Gratitudes: Write down 3 things you’re grateful for. 1 Min Intentions/Goals: Identify your #1 priority for the day, and write out the action steps needed to tackle the task. 1 Min Affirmations: I love the phrases, “I am happier, healthier, and more abundant today than I was yesterday,“ and, “Life is happening FOR me, not to me.”   Balance Your Body Instead of Weighing It It’s not about being a certain weight or jean size, it’s about FEELING your best! That means abundant energy, mental clarity, creating sexy lean muscle, and nourishing your cells so they don’t only look great but feel great. Skip the dieting! Learn to listen to what your body needs. And no, that doesn’t mean diving face first into a pile of donuts. Learn to identify what you want, why you want it, and how you’ll feel after you eat it. Say yes to cleansing for happy cells, and no to diets and deprivation! Say No To Juice Cleanses! Hello, sugar overload! Instead, consider doing a cellular cleanse utilizing intermittent fasting WITH nutritional support. It’s been around (and positively studied) for centuries. And it’s gaining popularity not just amongst celebrities and athletes, but also amongst us certifiable nutrition nerds, naturopaths, and vegans! It’s all about balance and sustainability (and of course, activating those anti-aging benefits). Reach out to me if you’d like a recommendation for your lifestyle! Stop Counting Calories! Instead, make your calories count. Meaning, don’t load up with a 400 calorie caramel latte full of sugar and chemicals when you can make homemade, delicious guacamole instead! Embrace (Healthy) Fat! Fat doesn’t make you fat. Sugar does! Load up on healthy fats like avocados, nuts, and olive oil. When you have a craving for sugar, it’s often really because your body needs the right fat! Hydrate! If you’re feeling tired, drink water. If you’re craving something, drink water! If you have mental fog, drink water!! The number one thing that hinders weight loss and is the reason behind lack of energy or mental clarity is not drinking enough water. Aim to drink 75% of your body weight a day in plain water (not coffee, juice, or teas)! Start off the day with a BIG glass of water as soon as you wake up. Ideally, with fresh-squeezed lemon for a big dose of energy-creating, immune-boosting vitamin C!   Don’t Forget to Have Fun!! As human beings, we naturally move towards pleasure and away from pain. When you’re dreading your next workout, it’s easy to come up with a dozen reasons why you should skip. So do something that excites you! Try a SoulCycle class with an instructor that inspires you! Or meet girlfriends for a salsa dance class! Nearly a year ago, I started a weekly girls workout group. We meet every Tuesday evening for an hour of sweaty fun! We do a 30-minute workout, followed by 30+ minutes “healthy happy hour,” where we experiment with fun protein shake combinations and catch up each other’s lives. I could do the workout on my own anytime, but the companionship of positive women holding me accountable is priceless! Reward Yourself! Don’t buy too-small workout clothes as an incentive to get smaller. Instead, focus on the behavior you want, and reward that. Splurge on that Sweaty Betty sports bra you’ve been eying once you’ve hit your 3x a week movement goal for two weeks. Treat yourself to a reflexology session as a welcome reward after completing your weekly goal. Or plan a yoga/surf retreat with your accountability partners for next holiday season! Create ways to associate a great feeling with achieving your goals, instead of beating yourself up for not being perfect.   Most importantly, remember that a healthy body you love is the vehicle to achieve all of your goals. You need the energy to kill it at work and to grow your side hustles. You need clarity to be your best in your relationships, including with yourself!   Learn more about Rebecca and her healthy lifestyle tips at www.rebeccacafiero.com.
Practical Tips for a Better 2018

Inside ToteSavvy

Practical Tips for a Better 2018

by Life in Play Team on Dec 26, 2017
Have you thought about your New Year's resolutions? Instead of a resolution looming over you the entire year, consider using our tips to simplify and strategize your life. Below you'll find tips from Hilary (our fabulous copywriter) and Lauren (our CEO)!   Goal #1: Work smarter, not harder   Hilary's Tips: My mom told me something she heard on a podcast the other day. "If something takes under a minute to do, just do it." I have really been trying to do just that, and it's working out well so far. These are little things I can sneak in when I have a free moment, and at the end of the day, it will have added up to much more. My goal is also to spend less time on my phone. When my daughter goes down for a nap, or to bed, it's easy to get out my phone and mindlessly scroll. However, there are so many ways I could otherwise be using my time. Sure, you could tackle some chores, but I'm talking about playing dominoes with my husband, doing a quick workout, reading a magazine, painting my nails, or, you know, sleeping. Being a stay at home mom can feel really isolating, and I find myself using my phone as a way to feel connected to the world.    Lauren's Tips: I recently read this article on The Every Girl and completely fell in love with it. The advice isn't groundbreaking (it's actually very basic) but it helped me feel like I don't need to be perfect to be a great mom. Number four is my favorite. Whenever I'm asked to bring something to a class party or friend's house, I feel the need to present a homemade Pinterest masterpiece. Next time I'm ordering cupcakes from the local bakery. 🤗  Keeping up with your inbox is one of the biggest productivity killers. I've learned to set aside 30-minute increments in my day to answer emails and clear out my inbox. I start with the most important issues and work my way to the simple responses. It may be a faux pas, but if a response isn't a priority, I generally push it off a few days. Friends and family know if they need a quick response, texting or calling is the way to go!       Goal #2: Get your child(ren) to help you     Hilary's Tips: Now that my daughter is 2, it is time to start having her help out around the house. Yes, you heard me! Chores are so important for kids. Not only do they help you out, but they build self-esteem, as well. Kids feel like they can contribute to the family, and it builds skills for adulthood. It is easy to underestimate what kids can do, especially when they're tiny and are still pooping their pants (diapers) on a regular basis. What I learned as a teacher, though, is that they will nearly always rise to the occasion. It’ll be worth it in the end. Here's an example of some age-appropriate chores. Remember, they're cumulative and build upon each other. Hell. Yes.   Lauren's Tips: Hilary and I are completely on the same page when it comes to having your children help out around the house. It's great for their benefit but also takes some of the stress off of your shoulders. Huge win, win!  Create a docking station: As soon as my kids arrive home from school, they know they need to take their shoes off, hang up their backpacks, and place their jacket in their cubby. Even the 2-year-old twins know exactly what to do and love that it pleases mommy so much. I created a little docking station for the three of them with a cubby bookshelf, these bins, and 3M hooks.  Self-serve snacks: One of my pet peeves is when my kids ask for snacks ALL DAY LONG. To help with this issue we created an area in our kitchen where our kids can find child-appropriate food to help themselves to. These storage containers are great for cereal and crackers. We even have a little measuring cup inside to help them scoop. Their plastic bowls and cups are also stored in a large drawer at their level. We also keep fresh fruit in a bowl they can easily access.    Goal #3: Prepare for the week ahead   Hilary's Tips: I have a little Sunday ritual. I take some time to fill in my planner with appointments and other obligations. I write out a general to-do list for the week. I write a grocery list and plan out what we will eat this week. I will look for coupons on some more expensive items, and I'll check Target's Cartwheel section (on their app) for any deals. Since I'm primarily a stay at home mom, I have learned that my days are very unpredictable. This is the complete opposite from when I was a teacher. My life was planned out to the minute! Literally! Now, I write a general to-do list for the week and plan a little time each day to tackle the list. I don't write anything specific for the day (unless absolutely necessary), and I pick a few items I feel like tackling during that time. It gives me more flexibility and I feel like less of a failure if things don't go according to plan.   Lauren's Tips: Bullet Journaling: I recently found bullet journaling (I know I'm super late to this party) and fell in love with how quickly you can manage just about every aspect of your life in a visually pleasing way. I stick to the very basic layouts (no caligraphy here), planning my weekly schedule, long-term projects, daily goals (like drinking enough water), and everything in between. It's helpful for me to plan ahead so when I open up my notebook on Monday morning, I can quickly transition into the work week without the extra cup of coffee to jumpstart my brain. If you're interested in a simple layout (like me) check these out. Perfectly simple!   Meal Planning: I both love and loathe to cook. When I have time, cooking feels relaxing and I genuinely enjoy preparing a nice meal for my family. On busy weeknights, the last thing I want to do is spend 30 minutes in the kitchen. Knowing this about myself, I plan a special meal every week (one that takes around 30-minutes to prepare) and 3-4 quick meals that really only require tossing a few things together. I grocery shop over the weekend so my fridge is fully stocked, saving me from the grocery store on weeknights. My favorite quick meals are Turkey Tacos, Turkey or Veggie Burgers (the Trader Joes Sweet Chili Veggie Burgers (frozen) are amazing! 🙌), and Teriyaki Pineapple Meatballs (Costco!) with pasta. Sometimes I swap the pasta for carrot noodles (also found frozen at Trader Joes) when I'm feeling extra healthy.      Goal #4: Simplify  Hilary's Tips: I have been doing a lot of thinking lately. What do I absolutely need to do ( It's a lot less than I thought. My biggest goal is to accept simplicity. This is a goal of mine every year. Being an anxious, Type A personality, I tend to be sorrrrrta neurotic. I have gotten better at saying no to things that make life too busy and hectic. It’s hard, and sometimes I feel guilty, but I’m much happier when I’m not stressed. Remember, "No," is a complete sentence! Don't always feel like you need to give a reason as to why you can't do something. I need to be better at setting realistic goals. I love to think I can do everything, but I can't. For instance, instead of cooking dinner 6 nights a week, my goal is now 3-4. I buy prepared food more often, and the meals are more simple than I'd prefer, but it is what it is. My family has full bellies and full hearts and that's what matters. Lauren's Tips: Simplicity has had a major comeback lately, and for good reason. I find myself striving to simply just about every aspect of my life so I can feel like there's room to breathe again.  Consider what's most important: Similar to the tips above, simplifying your life is really about figuring out what's most important to you, planning a way to achieve those things, and eliminating the rest. Like Hilary mentioned, learning to say "no" without guilt is key. It's okay to say no from time to time. Every single person you know will understand.  Channel your inner Marie Kondo: Clutter tends to complicate so a great way to simplify is to reduce the amount of clutter (possessions) in your life. If something isn't 1) useful, 2) meaningful, or 3) pleasant to look at, do you really need it? If the answer is no, get rid of it. It's incredibly freeing to be in an environment where everything meets that 3 critiera.      Goal #5: What can I take off my plate? Hilary's Tips: I tend to be very good at taking things on and not so good scaling back my life. This is definitely a work in progress for me! As moms, our "plates" are always overflowing. Have you heard of the mental load? It's really resonated with me and has rung 100% true. My husband is wonderful and he is "all in" as a father and husband, but there's just something about how differently our brains work. He's not thinking about what to pack weeks before we head on a vacation, and he's not losing sleep about what preschool our daughter should go to. I've learned to a) ask for help and b) delegate things to other people when I can (my husband is in charge of certain people's Christmas presents, for instance). I don't like asking for help. I like to think that I can do everything by myself, all the time. That is sooooo far from the truth.    Lauren's Tips: My personality type wants to do everything, all at once. I know that's not realistic (or healthy) so learning to take things off my plate has been an ongoing project.   Delegate at home: I'm the worst at asking for help, even when it's simply asking my husband to share in the meal prep or start bathtime. But if I don't ask, how will he know I need help? It took a while to get into the routine of asking, but now I'll do it without hesitation. Even better, my husband knows what I'll ask before I do and sometimes has already taken care of it.  Delegate at work: You have a team at work for a reason. Use them! For some reason I used to be timid to pass along projects to teammates, thinking it was inconveniencing them. Now I know to have an open line of communication. Sometimes it's best for me to keep the task, other times a teammate is eager to tackle it.    Here's to a wonderful 2018!
Power Baggage by Christy Carlson Romano

Inside ToteSavvy

Power Baggage by Christy Carlson Romano

by Christy Carlson Romano on Dec 13, 2017
A lot changes when you have a newborn. One of the first things you will notice is how many gifts come to your home. Whether they are hand-me-downs from family or boxes from Amazon, your house is sure to start to look a lot different. Move over sharp sided designer table, hello boxy play yard with musical lights and sounds. Your wardrobe will start to look a lot different, too. Your strappy heels? Say bye-bye until your feet stop being swollen from pregnancy and even then, the running around after your little one really deters you from throwing on your Louboutins for the rare postpartum girls night out. The question starts to loom in everyone’s mind (Mom and Dad), “where did my life go?”. Obviously, your life has only gotten better! You are in love with your little one and couldn’t be more proud of your growing family. But so much has happened to you physically and emotionally, that you can’t help but try to reconcile your pre-baby identity with the current happy mayhem. Look no further than your purses. You know, the one you pinned over until you managed to find it on sale? Or, if you’re like me, your purse collection. Purses are like family to me. I simply can’t say goodbye to them, as long as they are in working order. Naturally, it pained me to watch them on my shelf for the first couple months of postpartum life. I couldn’t help but over-pack when we were going down the street to the park. One thing’s for sure, if we were ever stuck on a deserted island, I would be ready! Well, my baby would be, anyway. It was only after seeing how ToteSavvy worked within my purses, did I decide that I could have the best of both worlds. I was able to fit anything baby would need at the park and streamline my new life into any of my beautiful purses. It was like the perfect merging of my two identities. You can’t help but end up with a lot of trinkets and baby gear in that first year, but with ToteSavvy, you still have the freedom to choose your style. Viva La Glam!!!
How Our CEO Packs Her ToteSavvy for Disneyland

Inside ToteSavvy

How Our CEO Packs Her ToteSavvy for Disneyland

by Lauren Kutting on Nov 26, 2017
This past week our family of 5 spent 3 magical days at Disneyland. The last time we visited the park I was pregnant with the twins. We only had one toddler to chase around, making the trip much different than the most recent one!  The trip ended up being a huge success. Our preschooler, who is obsessed with the princesses, got to meet her idols and secure their autographs. Our twins were elated to meet Mickey and Minnie and explore the wonders of both Disneyland and California Adventure.  Leading up to our trip, I strategized how we would approach having two additional kids to chase around. I knew we'd need a plan for diaper changes, snacking, hydration, and potential accidents, so in order to keep from taking the entire nursery with us, I planned to divide and conquer.  Our "diaper bag stuff" was split between two areas: under the stroller and inside my ToteSavvy Mini. Here's what I packed and why.    UNDER THE STROLLER DIAPER CHANGES Our Deluxe Changing Kit was incredibly useful! While ToteSavvy has a changing mat included, I love the convenience of the Deluxe Changing Kit because the changing mat just rolls out quickly and offers immediate access to wipes (without taking them out of a pocket). This is 100% why we created the Deluxe Changing Kit, and it proved to be a valuable asset during this trip.  COMFORT / WARMTH Los Angeles is notorious for having weird fall weather. It's cool in the morning and evening but can get up to 80˚ during the day. Knowing this, I dressed the kids in lightweight clothing, then packed a sweatshirt and blanket for each child. The blankets were folded nicely under the stroller (as were their sweatshirts) and came in handy when the twins wanted to take a nap mid-day.  We ended up draping the third blanket over the stroller to give them shade. This worked great! If you know one or more of your kids will nap at the park, definitely pack an extra blanket (breathable) to drape over the stroller.    EXTRAS We always have a Mommy Hook on our double stroller, allowing us to carry bags or hook my backpack when needed. Such a great product!  Additionally, our stroller has an organized attached to it (we love this one by Baby Jogger) for holding water bottles and extra items. The middle compartment, which has a magnetic flap, was the perfect place to store our autograph books and pens.      INSIDE MY TOTESAVVY MINI In an effort to pack light and not carry a huge bag around with me, I opted for a ToteSavvy Mini and my Henri Bendel Jetsetter Backpack. LOVE this combo!  Inside my ToteSavvy Mini, I stored the following essentials: antibacterial wet wipes hand sanitizer diaper bag buddy (includes first aid necessities) high-protein snack bars wallet cell phone extra diapers room keycard Disneyland passes misc. trinkets This is the lightest I have ever packed for an all-day outing with my family and I can say it was more than enough. We used the hand sanitizer and antibacterial wipes often, dipped into the band-aids a few times (to keep my shoes from rubbing), and ate all the snacks while waiting in lines. I had enough room around the ToteSavvy that I could have added more. This came in handy when I needed to throw any extra water bottle in my bag, or carry some special trinkets we picked up.               There you have it! An efficient and necessities-only diaper bag for our Disneyland trip. Every item is neatly organized with ToteSavvy Mini, allowing us to enjoy our day and not stress about finding what we need. 🙌          
How I Turned My Luxury Bag into a Diaper Bag: Louis Vuitton Highlight

Inside ToteSavvy

How I Turned My Luxury Bag into a Diaper Bag: Louis Vuitton Highlight

by Lauren Kutting on Oct 29, 2017
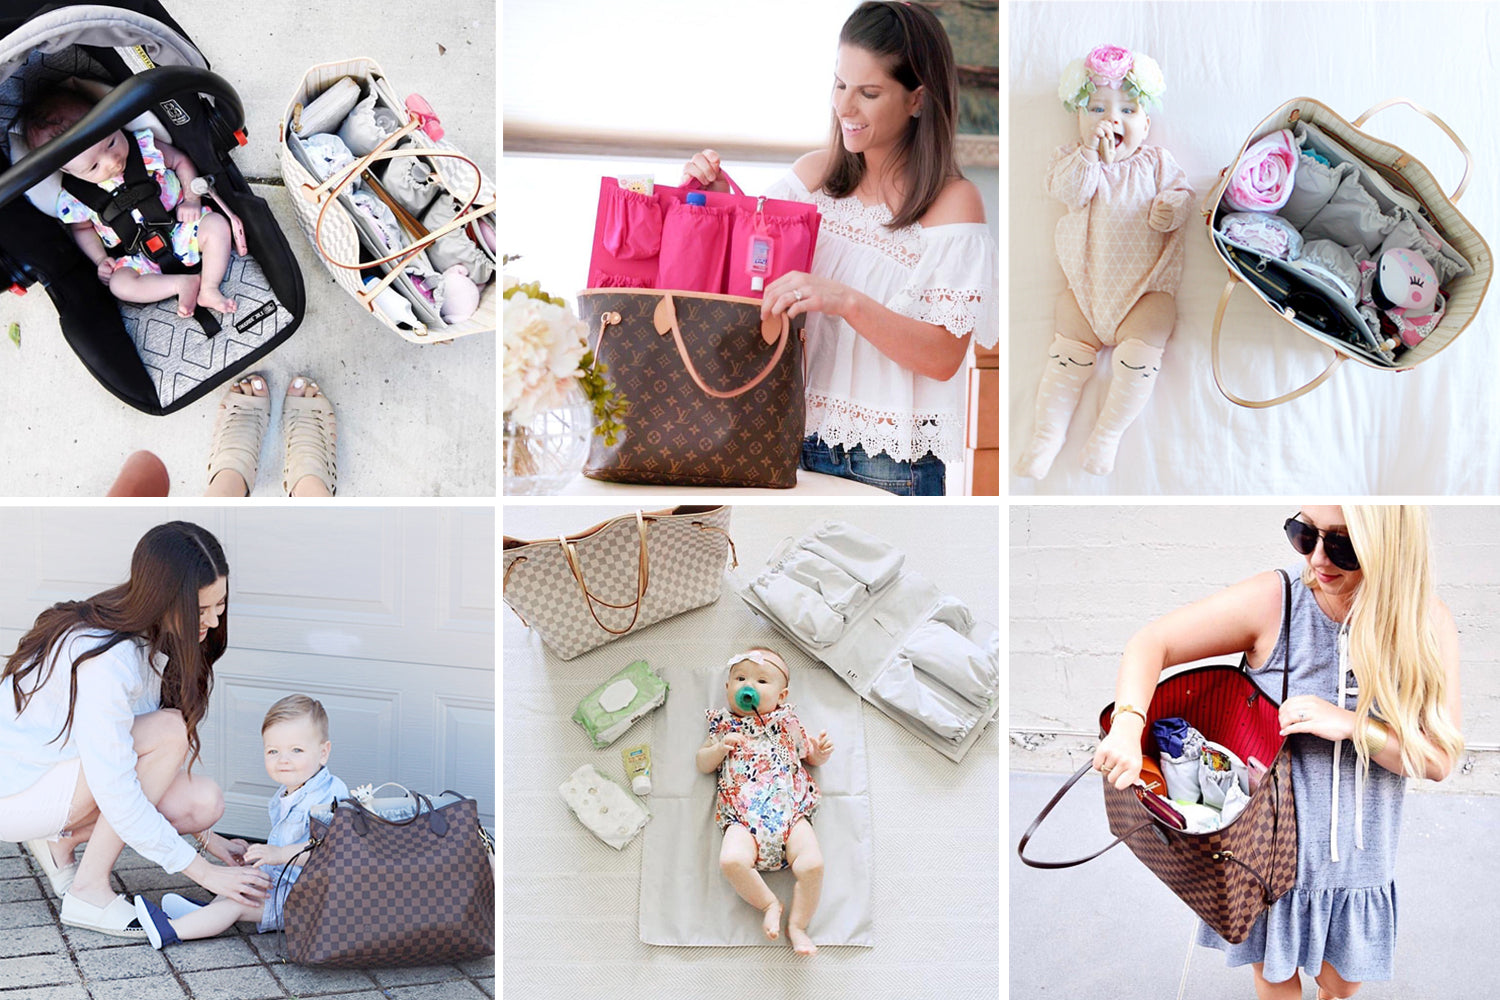
As I browsed around the first floor of Bloomingdale's, pregnant with my first child, I felt disappointed with the lack of fashionable diaper bag options. I’ve always had a thing for handbags, and to this day, believe your handbag makes your outfit. Surrounding the lackluster diaper bags was a magnificent selection of gorgeous totes, satchels, crossbodys, and every other bag you could dream of. Each had it’s own unique style––evoking a joyous feeling as I placed one particular style on my shoulder. Why didn’t I get this same feeling when browsing diaper bags? Simple. Because they were diaper bags. Then and there I decided I didn’t want to purchase a diaper bag I didn’t love. Why spend so much money on something I dreaded carrying? Instead, I gleefully walked into the Louis Vuitton store within the department store and asked to see a Neverfull. Now, this bag was awesome! I left the store without a diaper bag but instead with a bag I had been eyeing years. A bag that made me feel special and beautiful when I put it on my shoulder. This bag would be the perfect bag to keep me feeling myself after baby arrived. It was perfect. If you own a Neverfull you already know just how great the tote is, but also how unorganized it can become––especially when carrying around essentials for you and your baby. ToteSavvy was created specifically for this reason; to organize the open space inside your tote and make it compatible as a diaper bag. If this sounds like you and you’d rather carry a handbag you love over a short-lived diaper bag, ToteSavvy is perfect for you! Below are our tips for pairing ToteSavvy with the Neverfull to create the best diaper bag ever. *If you don’t own a Neverfull, any large tote will work similarly! Neverfull MM The medium size Neverfull is a great size for a diaper bag. It pairs with both ToteSavvy and ToteSavvy Mini. Below are images of both size inserts for reference. Left: Neverfull MM paired with ToteSavvy (original size). Right: Neverfull MM paired with ToteSavvy Mini Let's break down how each size ToteSavvy fits inside the MM Neverfull. The original size ToteSavvy (larger size) takes up the whole inner capacity of the tote. If you like a snug fit and don't want to see any wiggle room around your organizer, this is the perfect combo for you.  If you prefer to have room around your organizer for extra items, or just aren't a fan of a snug fit, we highly recommend paring ToteSavvy Mini (small size) with your MM Neverfull. As you can see from the image above, there's a decent amount of room around the organizer, allowing your tote to look less full.    Neverfull GM We highly recommend using the original size ToteSavvy inside the GM. It’s a near perfect fit and offers a little room around the sides for extra items like a blanket or sweater. Below you’ll see images of both the ToteSavvy and ToteSavvy Mini inside the GM. Left: Neverfull GM pictured with ToteSavvy Mini. Right: Neverfull GM with ToteSavvy (original size).  As you can see in the photos above, ToteSavvy is just about a perfect fit for the Neverfull GM. We wouldn't call this a "snug" fit because there's some room around the organizer, offering space for a blanket or sweater.  The ToteSavvy Mini, however, leaves a lot of room around the organizer. For this reason, we don't typically recommend pairing your GM with ToteSavvy Mini. With that said, some customers may prefer this fit. It comes down to your own personal preference.    Side by Side: GM vs. MM Our most popular ToteSavvy is the original size. Below you'll see a side by side comparison of the original size ToteSavvy in both the GM and MM Neverfull totes. This pairing truly does make an awesome diaper bag––one that you'll love for years! Shop ToteSavvy
DIY Halloween Costumes

Inside ToteSavvy

DIY Halloween Costumes

by Hilary Gebhart on Oct 15, 2017
  Not everyone wants to or has the means to spend a bunch of money on a Halloween costume that your kid will wear for a few hours. I got a Pottery Barn Kids catalog in the mail last week, and while their stuff is adorable, I won’t be ordering a $60 costume for my two-year-old. DIYing a costume is a great way to bond with your little one while creating something they can be proud of! If you play your cards right, it can be cheaper than buying a costume. Here are three costumes that we DIYed - I can’t wait to show you! We’ll be sure to share the cost breakdown, as well as the DIY experience. What’s great about these costumes is that there is some flexibility to each of them so you can make them your own (and use what you already have).   Superhero Costume What child doesn’t want to be a superhero? It’s so fun to pretend that you have magical powers and can save the world (who knows, maybe they will)! My daughter is not quite two, and she’s already saying, “Super _____!” thanks to a Daniel Tiger episode she saw. My favorite, naturally, is when she says “Superrrrrr Mamaaa!” because I 100% agree with her if I do say so myself. Anyway, what’s great about this costume is that you likely already have some basics at home, like a plain t-shirt or brightly colored pants. Your child can choose what colors they want for their costume, and it’s simple for them to cut out wristbands, a headband, a mask, and a letter for their shirt. Just make sure you trace something on the felt and fabrics so that your little one has something to follow! If you want to get fancy, you can always hot glue some velcro pads onto the accessories to reuse for dress-up or pretending. Otherwise, you can use some duct tape and make things simple and more temporary. Lauren’s daughter, Jackie, loved this costume and wanted to wear it all day - I don’t blame her! Total Cost: $11.88, including the t-shirt (she had leggings already)   Jellybean Costume How adorable is this costume? Kids love balloons, so this will be fun for them to wear! It didn’t take much time to blow up the balloons since we needed them to be small. To have an easier time blowing them up, choose balloons that are thin. The balloons are going to be so cute bouncing around as your kiddo runs from house to house. Clear trash bags can be hard to find, so give yourself some time to find them! We couldn't find one, so we improvised and made a jellybean skirt.  What’s great is that you can wear any colored shirt and pants, since they’ll all go with the balloons...I mean, jellybeans.  Total cost: $10.69 (excluding shirt and pants, which she already had)       Jellyfish Costume This costume is my favorite out of the three, I have to admit. I’ve seen a couple of jellyfish costumes in real life, but they didn’t have the LED lights. The lights, in my opinion, totally make the costume, especially since trick or treating will be done at nighttime. The eyes are easy to cut out, and the rest of the costume involved mostly tape and a tiny bit of glue. Something worth mentioning is that nearly half of the cost of the costume was the ribbon alone! Jackie loved the costume and also wanted to use it as a fort! I love her imagination. I also appreciate how this costume can be suited for kids or adults - just keep in mind the length of the tentacles. Total cost: $45.90     Admittedly, the jellyfish costume is on the pricey side. However, with all of these costumes, it is possible to price out items and look for coupons to lower the cost. Joann Crafts and Michaels always have coupons, and some supplies may be cheaper online as well. Happy shopping!
ToteSavvy & After School Sports

Inside ToteSavvy

ToteSavvy & After School Sports

by Lauren Kutting on Sep 24, 2017
    With school in full swing, after-school sports are beginning to pick up too. My oldest daughter just turned 5 which means she's all about her extracurricular activities. This season, soccer is her go-to sport! Adding after-school activities to my schedule seemed daunting at first––epecially with 2-year-old twins tagging along––but I learned a few tricks to make the addition easier and more enjoyable for all.    Organize Your Day the Night Before   There are evenings when I loathe this advice (because I just want to collapse onto the couch and not move) but it's truly a lifesaver. Every evening prior to soccer practice, I pack my ToteSavvy and my daughter's backpack. In the morning, I'm confident we won't forget something important at home (like her soccer shoes). I'll even go a step further and place everything right in front of the door so we literally cannot leave without it. Take that, mommy brain!        Equip Yourself With Snacks   The first question my children will ask me as we're leaving preschool is "do you have a snack for me?" With that in mind, I unfailingly pack an arsenal of snacks to be consumed both on the way to soccer and during practice.    One of my favorite gear items for toting snacks is the Logan & Lenora Wet + Dry Portfolio. I can store an extensive amount of snacks inside this pouch while fitting it nicely between the pocket panels of my ToteSavvy.             Make Yourself Comfortable   Soccer fields and parks tend to have limited seating. I don't mind camping out on the grass, but prefer to have something between myself and said grass to avoid stains or a wet behind. Gathre makes gorgeous bonded leather all-purpose mat perfect for our soccer practices. It's waterproof and completely wipeable too.  The three of us (my twins and myself) have a little picnic as we watch their sister play. My plethora of snacks keep the twins happy and entertained while I enjoy a quiet moment contemplating how it's possible I have a 5-year old soccer player already.            Bring a Beverage   Depending on the weather, an ice cold sparkling water or steaming latte is the cherry on top of your leisurely soccer practice. It may seem like a luxury to have a fun beverage on-hand but it's so worth it.  Your beverage can also be planned ahead of time (yay for planning!) keeping you from dragging 3 kids to Starbucks as you're running late to practice. I prep my beverage in the morning and pour inside a Swell bottle to keep it hot or cold. Cold beverages stay cool for 24 hours while hot beverages stay hot for 12.          
Air Travel Tips for 3 Kids Under 5

Inside ToteSavvy

Air Travel Tips for 3 Kids Under 5

by Lauren Kutting on Aug 27, 2017
    If you asked me a year ago, just the idea of air travel with my 3 kids would have brought on instant panic. We once flew with our 18-month twins and preschooler, thinking it wouldn’t be that bad. Well, it was that bad. It was so bad in fact that one passenger asked the flight attendant for scotch tape for our kids’ mouths. My husband wrote a hilarious blog post about this flight and others we’ve faced. If you’re in the mood for a fun read I highly recommend it. After our awful flight, we decided to stay put for a while until our twins were older and more capable of handling air travel. Luckily, we didn’t have a reason to leave home so staying around town was easy to do. Fast-forward to August 2017 after we committed to two trips (both 5-hour flights) all within 3 weeks of one another. Knowing what we experienced 6-months ago, I was not eager to get my kids on an airplane anytime soon, but the allure of visiting family and a tropical vacation calmed my anxiety. This time around I was determined to do things right. I took what I learned from the first few flights with 3 littles and applied them to my upcoming trips. I hope my mommy-hacks prove helpful to you as well. If they can help just one family get through a painstaking trip, then my job is done.   TIP #1  Make your kids carry their own stuff It may seem counterintuitive to have your kids carry their own things but trust me on this one. It really makes a difference. In my past trips, I was determined to cram diapering essentials, snacks, waters (for 4 people), clothing, entertainment, and my own necessities into one large carry-on handbag. What was I thinking?!?! My handbag ended up weighing about 15lbs and although it was nicely organized (thanks, ToteSavvy!) it was a pain to hold everyone’s stuff. Each time one of my kids wanted a snack or a coloring book, I had to reach down, grab it from my bag, and hand it to them. I realize this isn’t that big of a problem but as a mom with three kids, I was over it after the 5th ask. Instead of trying to carry everything yourself, have your kids each carry a backpack with their own activities, snacks, and water. Our flight was immensely better with this setup. Each child had their own seat (they were all over the age of 2) and their own backpack under the seat in front of them. If they wanted anything at all, they could reach down and grab it themselves. To my amazement, even my 2-year old twins loved this convenience. They thrived off of the independence and loved digging through their backpacks looking for hidden treasures (aka goldfish crackers and cookies).   Land of Nod backpack pictured above   On our first trip this summer my twins wore Land of Nod backpacks (pictured above). While I loved these adorable designs and large capacity, the size was a little large for their small frames. I think in a year or so they will fit much better and be a great option. Because of the size issues, we ended up hooking their backpacks on the stroller through the airport. This wasn’t a big deal to me but I find it necessary to fully disclose that my children didn’t actually walk through the whole airport with backpacks in tow. On our second trip, my twins wore these adorable little backpacks by My Little Pack Company. Aren’t they just precious?! The size of these was beyond perfect for a 2-year old frame, while still holding enough snacks and entertainment tools for a 5-hour trip.     My Little Pack Company backpack pictured above     TIP #2 Pack snacks, snacks, an iPad, and more snacks From my first tip, I think you’re getting the idea that snacks are essential when we travel. My kids don’t get a ton of snack food at home. We stock the house with crackers but rarely cookies, squeezers, gummies, and other snack foods. This comes in super handy when I need to keep my kids happy for 5-hours. They are so excited to be eating animal crackers that they’re well behaved for 15-minute increments. Along with a backpack full of snacks we carried an iPad (in our adult bags) for entertainment. I’m sure this isn’t everyone’s favorite form of distraction but it works for us and I honestly would rather have happy, quiet children than other passengers asking for scotch tape again. My preschooler happily watched a couple movies for both trips while my twins tuned in off and on throughout the flight. I found that rotating their “distraction” worked best. I would offer a snack, then offer a movie, then a sticker book, and so on. Once I had exhausted all of my options I was back at option 1 with a happy toddler ready for another snack. One last mon-tip is to pack a large booklet of stickers. My toddlers happily unpeeled and stuck stickers on themselves for at least 2 hours during the flight. 🤷‍♀️     TIP #3 Don’t forget to bring a stroller Ha! This is a big one. I can’t even believe we attempted this but hey.. you live and learn. If you don’t want to carry your children, bring a stroller. Hell, bring anything with wheels. They will not want to walk alongside you, and when they do want to be independent, they will be running full speed towards something hazardous. You can take your stroller all the way to the gate and check it under the plane right before boarding the aircraft. Be sure to let the front desk associates know you’re doing this so they can give you a special tag for your stroller.   TIP #4  Get digital with your boarding pass My husband loves efficiency so anything that helps streamline our day he’s all over. On travel days he makes sure to download all of our boarding passes to his iPhone so he can easily hand over his phone when going through security and boarding the plane. You can quickly swipe to see all boarding passes, and even scan them from your phone. Easy peasy. TIP #5 Look into Clear or TSA Pre Waiting in a security line with three kids is not fun. Then when you finally get up to the front you have to practically undress everyone and unpack your carry-on before proceeding. To make your life easier, consider signing up for TSA Pre Check or Clear if you fly regularly. Depending on which service you use, you may not even need to take your shoes off. Liquids and electronics still have to come out of your bag but it’s much less chaotic when you’re not chasing your toddler barefoot.   TIP #6 Organize your carry-on bag Carrying an organized bag on your flight is a no-brainer. It will help you access what you need, when you need it, and keep you feeling together. For my two trips this summer I decided to try something different. For the first trip, I took my Fawn Design bag––packed with a ToteSavvy Mini. For my second trip, I took a Goyard St. Louis Tote––packed with a ToteSavvy original size. My packing list was very similar for each trip which allowed me to determine which style of bag I preferred.   Here’s my verdict...   Carrying a tote has its pros and cons, as does carrying a backpack. I personally like being hands-free when traveling so the backpack is a clear winner for me. One benefit the open tote has is it's easier to access what you need. You can also bring your ToteSavvy original size (large) which helps carry more stuff.  Unfortunately, those pros were not enough to sway my opinion of carrying a tote bag while traveling from now on.    For future trips, my perfect situation will be using a convertible tote/backpack that fulfills all of my pros and none of my cons. Stay tuned for recommendations as I find them!    my large travel tote (Goyard + ToteSavvy original)   my travel backpack (Fawn Design + ToteSavvy Mini)    
Toddler Backpacks to Use with ToteSavvy Mini or Bottle Bag

Inside ToteSavvy

Toddler Backpacks to Use with ToteSavvy Mini or Bottle Bag

by Hilary Gebhart on Aug 20, 2017
Now that my daughter is a toddler, she loves carrying things around on her arms or shoulders. If there’s a stray grocery bag, shopping bag, or any sort of thing with a handle, she’s on it. Lauren mentioned to me how she wanted her kids to carry their own stuff for their summer trips (genius idea, by the way).  Since our kids are of similar ages, I wanted to give it a go myself, especially since we have some traveling coming up this summer. I cannot even explain how delighted my daughter was when she saw that she was able to try out not one, but two backpacks. My Little Pack Company makes the cutest mini backpacks for toddlers.  A lot of backpacks tend to be really large, making them too big for our little ones. I love the smaller size, and the padded straps made it so comfortable for my daughter to wear. It’s very neutral so it will go with everything! It’s perfect for an everyday outing with your kiddo. They just launched some really adorable patterns in their shop!     This backpack is perfect for carrying our bottle bag along with some other toys or books. I was actually able to fit a Munchkin 360 Miracle Cup in there along with a small section of my GoStak (yes, it's made for gym supplements - but clearly I use them in other ways!) that I use.   I tried to show that in this picture, but someone was too excited to stay away.     She was even wearing it while eating her breakfast. Can you see a little peek of her  ezpz Happy Bowl in this picture?   {Food in both hands, as usual. We love our Guidecraft Kitchen Helper, btw.}   {Lauren's twins sporting perfectly sized little packs. Swoon!} The second backpack we tried was from Land of Nod. It’s bigger in size and very colorful! I love how it had large zipper pulls for little hands.  This backpack would be perfect for a plane ride or a long day out. Although the backpack is bigger in size, it was not too big for my tall 21 month old. This particular backpack happens to fit our ToteSavvy Mini really well! We packed it full of goodies for our day. We packed a drink, some snacks, a book, some toys, a doll, sunglasses, a hat, and her diapers and wipes.    {I hate how this picture isn't centered, but #thestruggleisreal when you're at the park and trying distract your toddler from what you're doing!}   {How adorable is the unicorn?}   {Lauren's son at the airport!} My daughter is obsessed with keys and has to carry them on our walk to the mailbox. She has her own set of generic keys which I attached to the key clip. To say that she was thrilled was an understatement! She actually started saying the word “backpack” and went around the house collecting items to put in it.  Can we say adorable? I can’t believe my baby girl is ready for her own little backpack. Where does the time go? Does your toddler use a backpack? Have you ever paired it with a ToteSavvy Mini?
Out and About with Ezpz

Inside ToteSavvy

Out and About with Ezpz

by Hilary Gebhart on Aug 06, 2017
  We have all experienced (or heard stories about) toddlers picking up their plates and dumping their food out. For me, personally, it is one of those things that is just super friggin’ annoying - it’s messy, I spent time preparing food (how stupid of me), and I’m likely trying to do something else while my daughter is eating. It’s one of those things where, if I’m already irritated about something and then this happens, I just about lose my mind. Wait. I mean, I would never get short with my daughter or get flustered when she bugs the shit out of me. Luckily, there is a solution. ezpz to the rescue!     We have actually been using ezpz ever since my daughter started eating solids (so, just short of a year and a half). I was so excited to finally buy one because I had heard rave reviews! My first purchase was their Mini Happy Mat which is smaller and meant for high chairs and travel.  There are many things I love about ezpz. Where do I begin? Their mats are made from silicone, so they don’t absorb color or smells, and they’re easy to clean (totally dishwasher safe). Their silicone sticks to your counter or table, making it really difficult for your child to do the dreaded “I’m going to look you in the eye and dump my entire dinner on the floor” act that we all despise.   {Using the mat for the early days of Baby Led Weaning. It fit perfectly on her high chair!}   I have a confession to make, though.  Even though I used to be a teacher and taught reading comprehension all year, every year, my own reading comprehension is not that great. Until a few weeks ago I had no idea that the ezpz bag is meant to be saved and used when out in restaurants, enabling you to bring back your messy plate without messing up your purse. How genius is that? I was so excited to use my mat that I didn't read the packaging. No lie, I kept the bag from my Mini Mat thinking that it was a really nice bag and that I could repurpose it. I’m eye rolling myself so hard right now.      Did I mention that it fits perfectly into ToteSavvy’s side pocket? Because it does. Perfection.     Anyway. I feel very lucky in that my daughter loves food. Any kind of food. If it’s edible, she wants it. So, when I tell you that our mats have taken a beating and have been exposed to all sorts of flavors, colors, and sauces, I mean it!  Now that I know the Mini Mat can be used for eating out, I had to put it to the test. Will the bag work well? Will it survive washings? We went out to Mexican food (I wanted to go straight for the jugular and try out some messy food). My daughter had beans, guacamole, salsa, and carne asada marinade smeared on her mat. And rice. Oh, the rice. Toddlers eating rice is like Christmas tree needles: you’re never gonna get it all and you’ll continue to find it months later. Am I right, or am I right?   {Messy Mini Mat and restaurant necessities}   I put my dirty mat in the bag, took it home, and washed it. I  liked how the bag closed really easily. It was secure and no-fuss. When I washed it, it felt the same afterward. Honestly, I was pleasantly surprised! From now on, I’ll definitely be taking my Mini Mat when we go out to eat. Now, off to find its bag....  
Which ToteSavvy is Right For You?

Inside ToteSavvy

Which ToteSavvy is Right For You?

by Hilary Gebhart on Jul 30, 2017
While the original ToteSavvy may seem like a natural pick for an infant (and the Mini for a toddler), there are other ways to decide which ToteSavvy to use. I have both and use them differently. Which ToteSavvy is right for you? Let’s get started! If you are breastfeeding…the Mini is for you! If you are nursing, you don’t need extra space for a bottle or a formula (plus water to mix it with), so you may prefer the mini.  Don't get me wrong, I'm totally Team Fed Is Best (#whateverworks) but you gotta admit that nursing does save you space. Breastfeeding leaves you enough room to store the essentials (like diapers and wipes) without getting too bogged down by stuff that you don’t really need.  Boobs are so handy, aren’t they?    If you cloth diaper…you need more room, so the original ToteSavvy is for you! While cloth diapers are an economical (and environmental) choice for many, they do take up much more space than disposable diapers. Depending on how you pack your diapers, you can fit up to six in your ToteSavvy. You heard me. Six. Amazing, right?   If you prefer cross body bags…go Mini! While our own Tassel Tote can be a cross body bag, I rarely find that cross body bags are large enough to fit the original ToteSavvy. Now that my daughter is running around, I prefer to carry a handbag that has a shoulder and cross body option. Having the cross body strap really comes in handy when you have your hands full or need to be hands-free. I find that a lot of shoulder + cross body bags are roomy enough for the mini and have space for another item such as my water bottle or a sweater.   If you are always out and about…then the original ToteSavvy is for you. I love how ToteSavvy makes me feel like I can take on anything. There are enough pockets to fill your bag with whatever you may need. Seriously. While I prefer to have some down time at home each day, I have many friends who leave the house in the morning and are out for most of the day, every day. In those situations you’ll want the extra space for more drinks, snacks, changes of clothing, and the like. ToteSavvy will hold everything you need for long days out with your kiddo.   If you have multiples…the original ToteSavvy is the way to go. You have two (or more) kids, so you’ll need a lot more stuff simply to survive! With twice as many kids your likelihood to experience some sort of “adventure” (read: blowout, hunger, general mayhem) goes up exponentially. The original size will give you enough room for the kids’ stuff as well as your own, like emergency chocolate or a tiny bottle of wine. I’m half kidding about the wine (but really, why do they make those tiny bottles anyway).   There really is a perfect ToteSavvy size for any given situation. Which one do you typically use?
The Best Backpacks for ToteSavvy

Inside ToteSavvy

The Best Backpacks for ToteSavvy

by Hilary Gebhart on Jul 23, 2017
photo courtesy of @thiswildlove   While we love a good handbag, here at Life in Play, sometimes you just need to be totally hands-free. Here are our current favorite backpacks, perfect for an everyday outing or a full day of adventure with your little.   Baggu Drawstring Backpack, Baggu ($42)     I love the casual, current look of this Baggu backpack. I own a few Baggu reusable shopping totes, but I didn’t know they made bags (and backpacks) until I was shopping around for my Affordable Handbags post. I came across some at Macy’s and was so intrigued! They are really sturdy and high quality. I love this olive color, but their blue and white striped one just screams summer! (Best fit: ToteSavvy Mini)   Fawn Design, Fawn Design bag ($159.99)   It’s no secret that we love our Fawn Design bag! This backpack can also be a messenger bag, which is so handy. This bag already has pockets inside, so with the ToteSavvy you will be more organized than ever! I love the easy look of their bags. (Best fit: ToteSavvy Mini)    Women’s Chambray Polka Dot Backpack, Target ($29.99)   As we all know, the ‘90s are back! What’s better than old school backpack that’s been updated? Plus, this bag is super easy to pick up on your frequent trips to Target. We know you go there at least once a week! The polka dots add a little bit of interest while keeping everything very neutral. (Best fit: ToteSavvy mini)    Kanken, Fjallraven ($80.00)     This backpack is so neat! The top handles are bigger than a normal backpack, making it truly comfortable to carry it by the handles if needed. There are two slim outside pockets, but their profile is such that they’re barely noticeable when not in use. This bag also comes in an insane amount of color choices, making it easy to match your personal style. (Best fit: ToteSavvy Mini)   The Transport Rucksack, Madewell ($198.00)     I am such a sucker for cognac colored bags, and this is no exception. I love the collar stud closures. The outside pocket is perfect for things like your phone, tissues, or hand sanitizer - things you’ll be reaching for often. (Best fit: ToteSavvy Mini)   Watson Lane Hartley, Kate Spade ($248.00)   You guys. I cannot handle the stripes on this backpack - how cute are they? This backpack is made from Kate Spade’s signature nylon, so you know it’s durable and easy to clean. Plus, that makes this backpack really light to wear. I like how the straps are padded for comfort. You'll need that when your kid decides to bolt in the parking lot. (Best fit: ToteSavvy Mini)   Dawson Backpack, Herschel ($69.99)       This backpack is one of the taller ones I’ve come across. I appreciate these types of backpacks because I can easily shove a sweatshirt in the top, no problem. I had a really hard time coming up with which color to put here, since the backpack comes in nearly thirty colors and patterns! The drawstring cord and buckle closure make sure your items stay safe inside. (Best fit: ToteSavvy Mini)   Siesta Key Backpack, Tommy Bahama ($98.00)     What’s more summery than Tommy Bahama? I love this watercolor print; it’s unlike anything I’ve come across before. The leather  handle and zipper pull really tie this all together in classic Tommy Bahama fashion - relaxed, but classic. The nylon lining is always a plus, since we all know spills are bound to happen now and again! (Best fit: ToteSavvy Mini)   Tassel Tote, Life In Play ($198.00)   I couldn’t finish this post without including our own Tassel Tote, which is the most versatile bag featured here. It can be worn as a cross body bag, shoulder tote, and a backpack. Its pebbled grain leather is super soft and will stand the test of time. Plus, black is a color that is perfect year-round. My favorite color combination for summer has always been black and white. You’ll look so chic wearing this bag wherever you go! One thing to note is that this is the only backpack I have found that will comfortably fit the original ToteSavvy. While I love the Mini (I use it on a daily basis), some situations call for more items, and the original ToteSavvy is meant for just that. Since this bag was made specifically to fit the ToteSavvy, you can't get a better fit than this!   I love how there are so many stylish backpack options at all price points. There truly is something for everyone! Which backpack do you like to use?
Easy Dinner Hack with One Potato

Inside ToteSavvy

Easy Dinner Hack with One Potato

by Lauren Kutting on Jul 16, 2017
Lauren, founder of Life in Play, here! As a working mom, planning and preparing weeknight meals can be a real challenge. I love to cook but with 3 kids (including 12-year-old twins!), it's hard to find the time to plan a weekly menu, shop for groceries AND cook after a long day at work. Enter One Potato. I learned of their meal kit service while exhibiting at ABC Kids Expo and immediately fell in love with the concept. It's similar to Blue Apron or Plated, where they ship ingredients and recipe cards to your home on a weekly basis. The difference that One Potato has (and a HUGE value in my opinion!) is they cater to families. I've tried Blue Apron and other meal kit services, but none of them are as accommodating to families as One Potato. One of the key perks to One Potato is I don't have to spend time on the weekend planning a menu. All I have to do is log into my account and select either the "omnivore" plan or the "vegetarian" plan. I can see the meals shipping that week and can make adjustments if needed. They also offer nut-free and gluten-free meals. A huge relief if someone in your family has allergies! The second amazing difference One Potato has is they include pre-chopped ingredients. Can I get a hallelujah?! As much as I love cooking, the act of leisurely preparing meals is now saved for date nights. I don't have time for that during the week. #sorrynotsorry      The photo above shows the ingredients inside their "Spaghetti and Turkey Meatballs with Caesar Salad" meal. As you can see, the ground turkey arrived pre-mixed with seasoning (major time saver!), as did the salad dressing and marinara sauce. Their recipe cards clearly lay out each step and showed helpful photo examples. For this recipe, the first step was to ball the ground turkey and sear it on the outside. After a quick sear, I popped them in the oven for a few minutes before adding my spaghetti noodles to a pot of boiling water.  Each step was simple and efficient. They have you prepare one aspect of the dish while another is cooking. I appreciated how easy the preparation was and it was clear they designed the instructions with a parent in mind. Each recipe card highlights ways to get your kids involved in the cooking. I absolutely love that. My preschooler is at the perfect age to be my sous chef. Though, as luck would have it, on this particular night she was more interested in building her lego castle than helping mama. Go figure!        The entire cooking process took me exactly 30 minutes and that includes taking the time to stop and photograph each step. Had I not needed to document this meal, I'd say I could have had dinner ready in 20 minutes. In my opinion this is another major benefit of One Potato over other meal kit services. They know you don't want to spend 45 minutes preparing dinner.      Let's talk about portion size. One Potato caters to families not only because they offer easy-to-prepare meals that are also kid-friendly, but they actually provide enough food to feed our family of 5. We even had left over spaghetti that I ate for lunch the next day :)  Plating our dinner was easy thanks to my go-to plates for my crew. I absolutely adore Replay Recycled's plates. They are made from recycled milk jugs and are incredibly durable. My kids also love the fun colors and divided sections.        Now, being a little bit of a foodie (or was a foodie... does it still count when you don't really eat out anymore??), I was impressed with the flavors of this meal. The meatballs were juicy and flavorful, the pasta sauce had a nice sweetness to it which had me wanting more, and the Caesar salad was the perfect touch to satisfy my appetite. It felt like a luxurious meal (dinner out even) without the high price tag or labor involved.   My kids gobbled their dinners up as well. Pasta and meatballs are kind of a no-brainer for us so I knew they'd be into it. I like that every recipe in the weekly box was kid-friendly. The next night we had their "Tuscan Chicken" dish which included roasted cauliflower and avocado toast. The cauliflower was tri-colored which helped in my negotiation to get the little ones to try their veggies. Clearly One Potato is run by parents!      My final opinion on One Potato is if you're looking for an easy way to get kid-friendly gourmet meals on the table with little effort, this is the meal kit service for you. Before learning of them, I thought there was a huge gap in the market for this type of service. No one was accommodating families. I'm glad they stepped in and developed a truly family-friendly service. Us moms and dads have so much going on (whether you work full-time or not) so it's nice to take the stress of dinner out of the equation.  Keep doing you, One Potato!     
The Story Behind ToteSavvy

Inside ToteSavvy

The Story Behind ToteSavvy

by Lauren Kutting on Jun 25, 2017
  Over the past 3 years I’ve mentioned how the idea for ToteSavvy came to be in a few articles I’ve written. You may have read about our chaotic flight which led to a rough sketch, then a prototype which would soon become ToteSavvy. While both of those facts are true, the whole story behind ToteSavvy is much more complex.   It was the Spring of 2012 and I had just announced my first pregnancy to the world. My husband and I were elated to be expecting and couldn’t wait to begin to prepare for our little bundle of joy. Both of us are major planners and agreed upon completing our nursery and baby-proofing our house before the 2nd trimester. Don’t we sound like first-time parents?!?   Part of our prep work involved purchasing every baby essential on our generic “must-have” list. One of those items was, of course, a diaper bag. Now, being the fashion-driven woman I was, I decided it was only fitting to carry the most fashionable diaper bag the world has ever seen. I surely thought I could find such a diaper bag– even if it meant shelling out a pretty penny for it.   My husband was working in advertising sales at the time and regularly visited the NYC office. I decided to tag along on his trip to get some great shopping in. I had visited NY a few times before and knew that was the place to find literally anything. Every store was stocked with the best on-trend items. In my mind I could absolutely find THE BEST diaper bag in New York.   I excitedly set out on my first shopping attempt– headed to the big department stores. Barneys, Bloomingdales, Nordstrom, and Saks Fifth Avenue were all on my list. I browsed around the department store for a while before the realization set in that every single handbag I was drawn to was not a diaper bag. When I asked the sales rep where their diaper bags were located I was directed towards a few designers who sold a version of a nylon puffy-vest looking diaper bag. “Is this it??” I said in a shocked tone. After suggesting there had to be a bigger selection I was directed towards the baby department. Even there the options were limited. It seemed that every brand designed into the same silhouette and fabric. Yes, I understood that pockets were needed but why did they have to be all over the outside of the bag? And why was the style so similar to every other diaper bag around? Was the point to call attention to the fact that is was a diaper bag and not a beloved handbag?   Feeling defeated, I ventured over to the designer section which was completely out of my price range. I figured I would just take a look and then strategize how to work it into our planning budget. Diaper bags are pretty crucial after all!   Even the high-end designers didn’t have great options. LV doesn’t make a diaper bag, but they did show me many options that could work. The other designers had 1-2 options that still screamed baby. Why was it nylon? Why did it have to have those darn pockets all over the outside? I fully understand utility but there was nothing simplistic or effortless about them. They didn't even compare to the variety of gorgeous handbags across the rest of the store.   I decided to call my search quits then and there. I sure as heck wasn’t going to spend mega-bucks on something I didn't love. Throughout my pitiful search I kept wandering past the Longchamp section. In an effort to not leave empty-handed I decided to just pick up their Le Pliage Large tote and call it a day. It was big, had a zipper and seemed like a great bag to use for baby. Done and done!   I didn’t think much about my make-shift diaper bag until my daughter was about 3-months old and we were planning a trip to visit family in Ohio. All of a sudden it occurred to me that I would be traveling with my newborn and couldn’t take the nursery on the plane with us. Trying not to panic I carefully laid out every baby item on the floor of the nursery, thinking about what I’d need for our flight. I methodically and efficiently packed my empty-vessel “diaper bag” with each item– fitting just about everything I needed. I ended up with a full tote that looked decently organized. I felt amazingly accomplished. I had done it. I didn’t need a true diaper bag after all!   Any seasoned mom is probably thinking… “how long did your purse stay organized?”… and they are so right! It took all of 15 seconds on the airplane for my precisely organized tote to turn into a chaotic mess. All 5 of the pacifiers we packed (inside a little baggy to keep them clean) were MIA while diapers became tangled within a swaddle blanket. Wet wipes? No idea… under the seat maybe? Needless to say, it was the last flight I would ever take that disorganized.   Upon our arrival, my mind was crazily racing as I tried to think of a quick solution. No way was I going to do that all over again in 2 weeks. I thought about running out to buy a generic diaper bag, or finding a bunch of little pouches to keep things together, but neither solution seemed right. What I truly needed was pockets. I couldn’t afford to waste time taking 3 different pouches out of my bag as I searched for a diaper– or try to unzip said pouch with one hand. I finally understood why a diaper bag was necessary, but still couldn’t come to terms with settling for one I didn't love.   While nursing my daughter a few days later an idea came to me. What my Longchamp tote needed was pockets. I didn’t want to sew them into the bag because then it would forever be a diaper bag. However, if I made them removable then I could simply use it as a diaper bag when I needed to, and as my chic tote on other occasions. That was it! The idea of a removable pocket system to organize my handbag was exactly what I needed!   After returning home a few weeks later I was eager to get going on my “diaper bag caddy”. Sewing has always been a passion of mine so I was excited to put my practical skill to use. I started with the simple concept of adding pockets to my bag. These pockets would, of course, have to be shaped with the right dimensions for each baby item I needed to carry. I took out every baby essential in our house and measured them one by one. To my amazement, many of them had a similar shape. Diapers and wet wipes fit within a standard size pocket, as did many bottles, cups and baby kits. Clothing and blankets could even be rolled to fit perfectly within this pocket size I had developed.   I made a couple pocket prototypes and thought about how to add them to my handbag. They were the perfect size but I couldn’t figure out how to keep them from collapsing without sewing each to the bag. Then it hit me. I had just finished a DIY toy box tutorial for my daughter’s nursery and new the perfect material to use to keep those pockets upright. I used a rigid mesh material to act as a wall for my pockets. It was thin, pliable and super lightweight– literally it couldn’t have been more perfect for my purpose.       After a couple days of on and off sewing I had completed my first prototype. I felt invigorated as I quickly packed my bag with each essential and gazed down at the organized perfection. I could see each and every item inside my pockets. It was easy to just reach in and grab what I needed. When replacing an item I could easily slip it back in without repacking everything else. This was it!! I finally had my solution!   I carried around my prototype in my handbag for months– proudly showing it to friends and family. In the back of my mind I knew I had something, but I wasn’t sure I was ready to take the next step everyone was urging me to take.   At the time I was still sewing bridesmaid dresses under my own clothing label and was making a decent living. Though I would never admit it at the time, I was looking for a way out but didn’t want to admit defeat. In my eyes, closing the bridesmaid business meant I had failed. Failure was not an option for me.   It wasn't until my daughter was 15 months old that I took the next step to turn my little “diaper bag caddy” into a true product. Life with a toddler was harder than I ever could have expected, and I knew I didn’t want to spend 8 hours a day sewing dresses. I had been carrying my organizer in my bag every day and still found it to be the most useful baby item I owned. I knew it was time to stop sewing and look into manufacturing.   I had considered manufacturing my bridesmaid dresses but never committed to it. The cost was high and it was hard to justify such a large investment when styles and popular colors were always changing. What I needed to sell was one product that never went out of style. One product that I could confidently stock up on because I knew I could sell it. That one product had been sitting in my handbag for a year. It was finally time to develop it.   I researched manufacturers online and sent out emails to my top 10. I imagined I would have everyone begging to develop my product and I would narrow my results down after interviewing each one. Boy was I wrong! After a few weeks I got a response from two manufacturers. One was kind enough to let me know that they only do mass production orders (10,000+ units) but would be happy to speak with us down the road. The other was a small handbag manufacturer based in NY. They liked my idea and thought it was something they could prototype.   Within a few weeks I was shipping my only organizer cross-country along with fabric samples, sketches and a copious amount of notes. I was terrified it would be the last time I would ever see it, or worse, my idea would end up for sale online the next day. Luckily, the manufacturer I connected with was one of the good ones. They crafted their sample within a few weeks and quickly FedExed it to me to get my feedback.   As I grabbed my scissors to open the package and examine my first sample, my body was flooded with emotion. Would it be a terrible sample? Would I have to pay for 5 more revisions that I couldn’t afford? Would it be perfect and I would actually have to go through with this? To my delight the sample looked amazing. They had nailed the execution of my exact pattern but with expert craftsmanship and quality materials. I couldn’t believe it. I held in my hands a true product– one I could see being carried in the totes of parents everywhere. Then the panic set in. I had no excuse. I had to jump in head-first and build a brand.     Within a few weeks I was working on a full Kickstarter campaign and getting ready to launch my idea to the world. Within 1 week of the Kickstarter project being live, I learned the biggest lesson about business and marketing. Nothing happens by chance and everything is earned. We had a slow start but after countless hours spent asking friends and family to pledge, we were close to hitting our goal.   If I had to do it all over again my strategy would be completely different. I underestimated the power of marketing and press. Something I never underestimate now. What I didn’t know when I first launched Kickstarter was no one knew what my product was. The name wasn't right and it took too much time to explain the benefits of my organizer.   By shear luck we met our $35,000 goal and were funded with about 1 day to go in the Kickstarter campaign. It wasn’t until a year later that I began to understand how to appropriately market my product. First on the action item list was to come up with a better name. With the help of some amazingly smart friends and countless hours going over every combination imaginable, ToteSavvy was born.